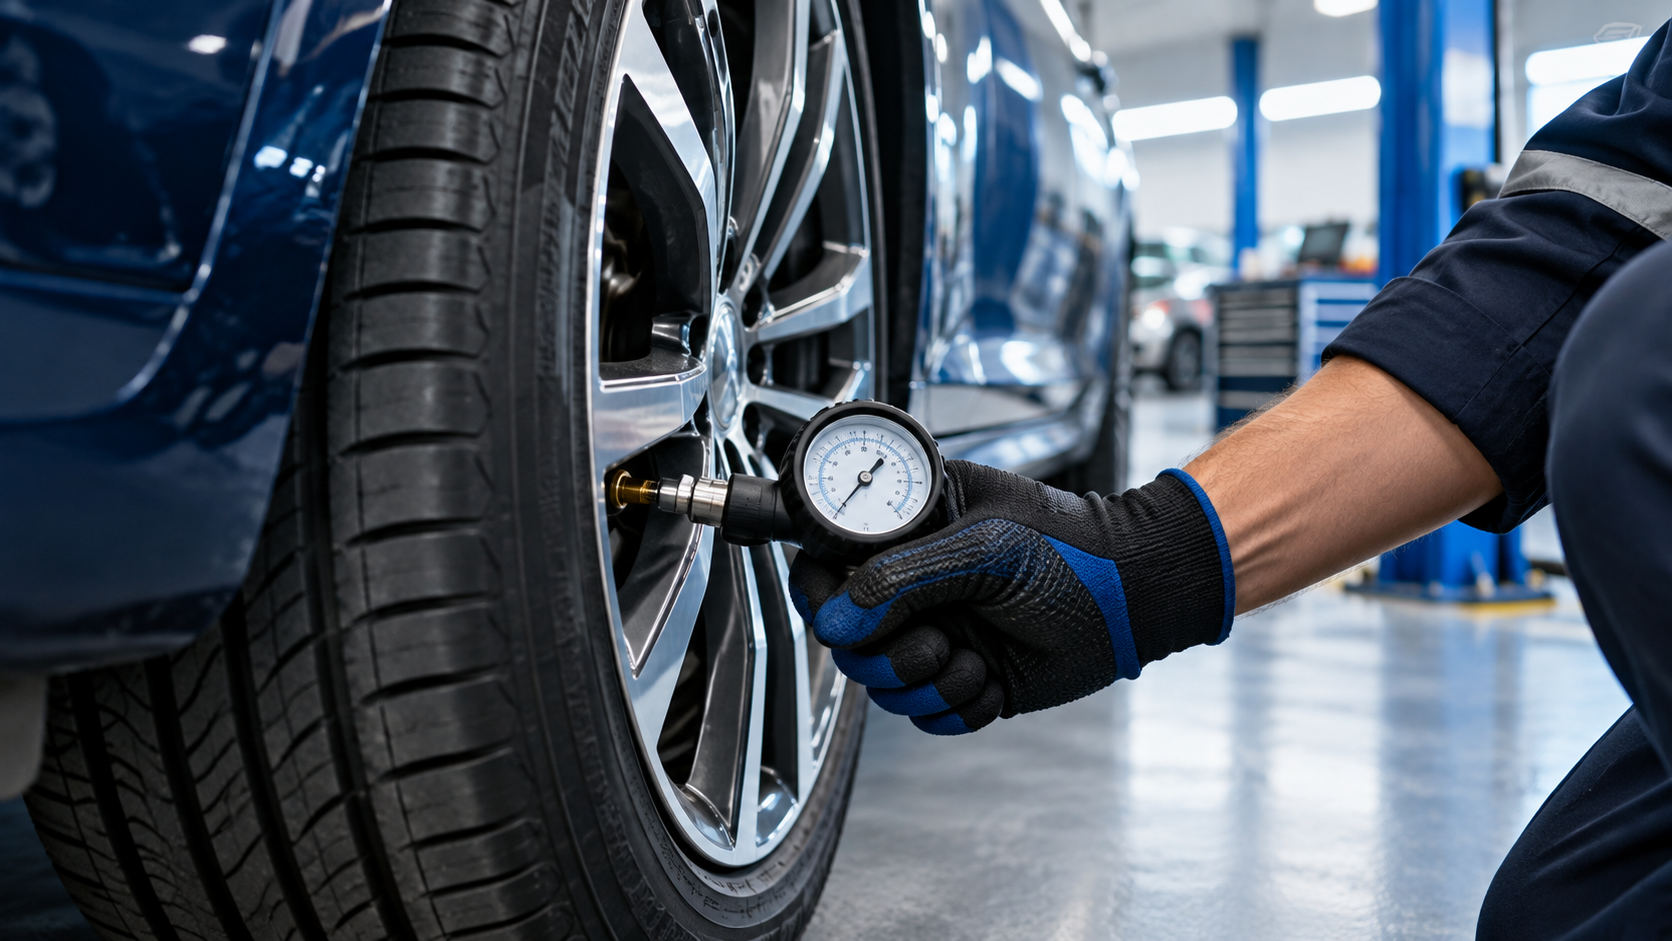
Category: Maintenance

Practical guides to scheduled servicing, tires, fluids, batteries and common symptoms. Understand what to check, what your owner’s manual specifies and when to seek a qualified technician. This section covers vehicle care and fault awareness; driving habits and ownership paperwork belong in Ownership.

  • Electric Car Maintenance: A Practical Owner Checklist

    Electric Car Maintenance: A Practical Owner Checklist

    Battery-electric cars still need routine maintenance, even though they have no engine oil changes or exhaust system. Their schedule usually covers tires, brakes, cabin filters, coolant on some models, inspections, and software or recall work. The exact list depends on the vehicle, so use its manual and service notices rather than a generic interval chart.

    Start with the manufacturer’s maintenance schedule

    Find the maintenance section in the owner’s manual or the vehicle’s service app. Note the time or distance interval for inspections and consumable parts. Some checks are tied to calendar time even when the car is driven little. Keep receipts and digital service records, as these may be useful for warranty questions and future owners.

    The U.S. Department of Energy’s Alternative Fuels Data Center explains that all-electric vehicles have fewer moving parts and fewer fluids to service than conventional vehicles. It also notes that the battery, motor, and associated electronics typically need little scheduled maintenance. That does not make every EV maintenance-free. Cooling circuits, brakes, tires, suspension, cabin filtration, and the 12-volt electrical system may still need attention.

    Check tire condition and pressure

    EVs can place different demands on tires because vehicle weight, torque, and wheel choices vary. Inspect the tread and sidewalls for damage and uneven wear, and measure pressure when the tires are cold. Use the specification on the vehicle’s placard, not the maximum number printed on the tire. Rotate tires only in the pattern and interval allowed by the manual; staggered sizes or directional tread can restrict rotation.

    Listen for new vibration, humming, or a change in handling. These signs can come from tires, wheel bearings, or suspension parts. Arrange an inspection if the car pulls, shakes, or repeatedly loses tire pressure. Our tire pressure guide covers the basic gauge check.

    Keep the brakes in working order

    Regenerative braking can reduce use of friction brakes, but the brake pads, rotors, calipers, and fluid still matter. Infrequent friction-brake use can allow corrosion or sticking, depending on climate and vehicle design. Follow the inspection schedule and pay attention to a change in pedal feel, grinding, pulling, vibration, warning lights, or longer stopping distances. Ask a qualified EV technician to inspect the system when symptoms appear.

    Some EVs use a special procedure or service mode for brake work. Never assume a conventional-car repair procedure applies. Do not work on high-voltage components or orange cables. Use a shop trained for the vehicle and tell them about any warning messages.

    Check cabin filters and cooling guidance

    The cabin air filter usually has a time or distance interval. Replace it according to the manual, especially if airflow drops or a persistent odor appears. Some EV batteries use liquid cooling. The DOE notes that these systems may require regular checks; the owner’s manual specifies whether the coolant should be inspected or serviced and who should do it. Do not open a sealed high-voltage cooling circuit or add a generic coolant.

    Keep cooling-air openings clear of leaves and debris if the manual identifies an owner-cleanable intake. Do not spray water into vents or wash around electrical connections in a way the manufacturer does not permit. If the car displays a battery or thermal-management warning, follow its instructions and contact the service network.

    Care for the 12-volt system and charging equipment

    An EV’s 12-volt battery powers control systems and may prevent the car from starting when it fails. If the vehicle shows electrical resets, trouble unlocking, or a low-voltage warning, consult the manual or roadside service. Owners should not touch the high-voltage traction battery. For charging, inspect the cable and connector for visible damage, keep contacts clean and dry, and use equipment approved for the vehicle and region. Stop using a cable or outlet that is cracked, hot, or discolored.

    Charging practices and battery-care recommendations vary. Follow the carmaker’s guidance for charge limits, storage, and long periods when the vehicle will not be used. The displayed range is an estimate that changes with temperature, speed, climate control, terrain, and driving style. A sudden unexpected range change or battery warning merits a service check.

    Track recalls and warning messages

    Check the manufacturer’s notices and the recall database for the country where the vehicle is registered. A software update may address a safety or performance issue. Do not ignore a high-voltage, battery-temperature, brake, or charging-system warning. Follow the on-screen instruction and arrange service where needed.

    Routine care keeps an EV ready for daily travel, while diagnosis and high-voltage repair belong with trained technicians. See the DOE’s EV maintenance and safety overview and review the schedule for your exact model.
  • How to Inspect Engine and Cabin Air Filters

    How to Inspect Engine and Cabin Air Filters

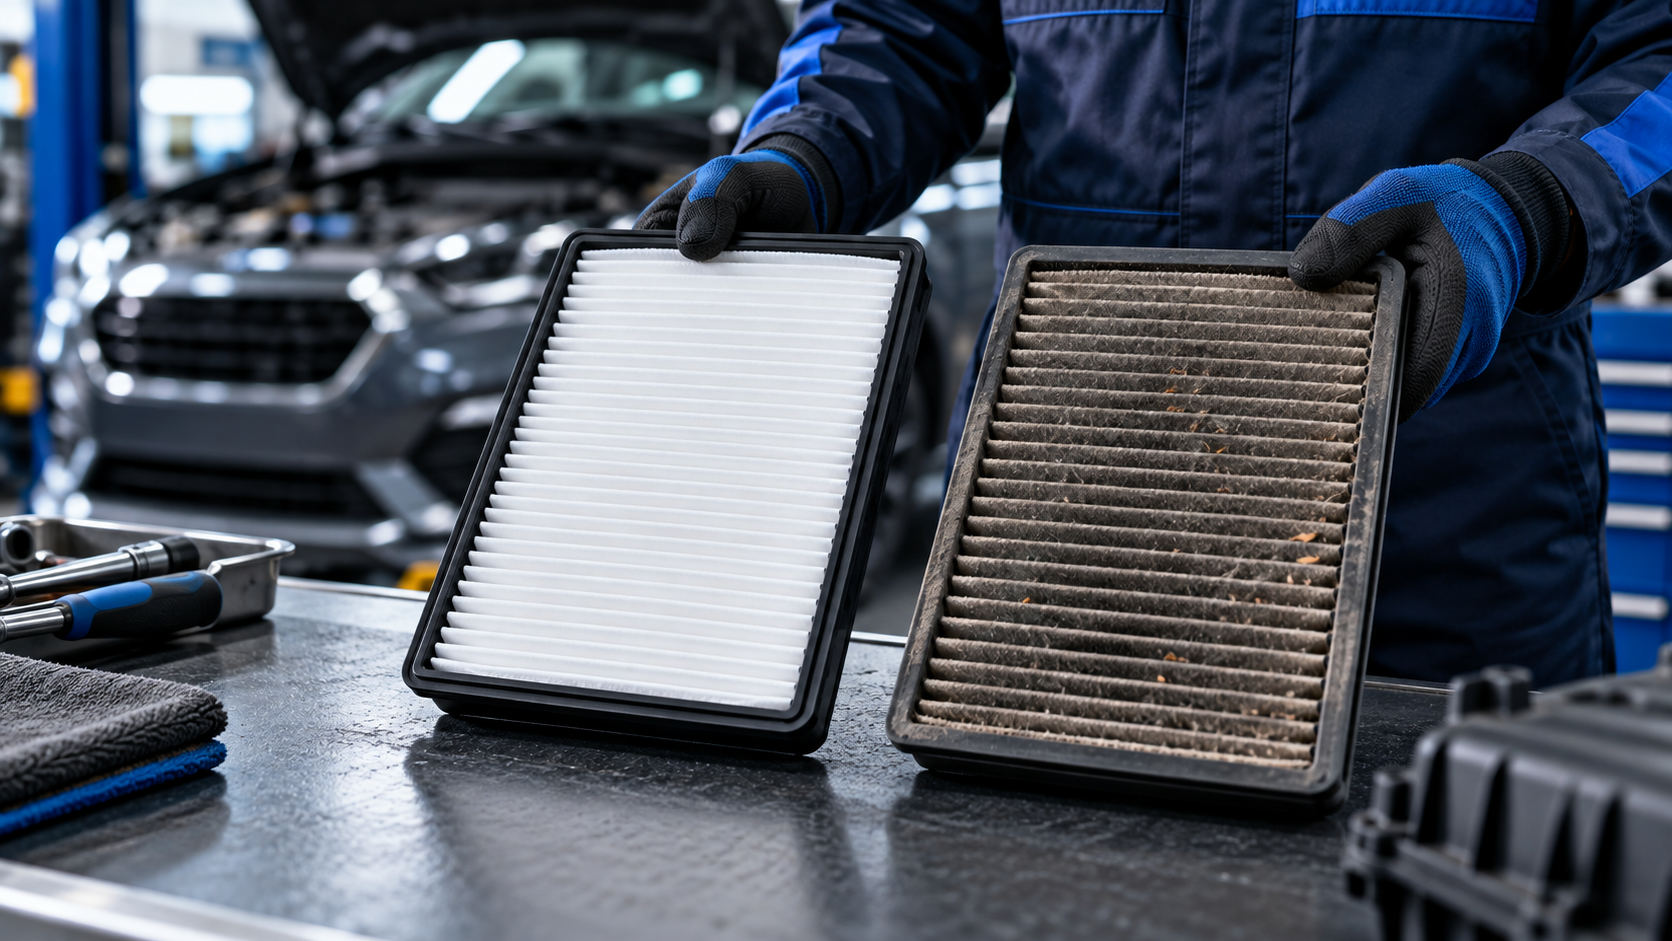
    Many cars have two air filters with different jobs. The engine air filter keeps dust and debris out of the intake. The cabin filter reduces dust and pollen entering through the heating and ventilation system. Checking both is a modest maintenance task, but the interval and replacement procedure depend on the vehicle.

    Know which filter you are looking at

    The engine air filter is usually in a housing connected to the intake duct under the hood. A clogged or damaged filter can restrict airflow, while a filter that is seated incorrectly can let unfiltered air bypass it. The cabin filter is often behind the glove box, under the dashboard, or near the base of the windshield. Some cars have more than one cabin filter, and access may require removing trim or panels.

    Use the manual to identify the correct part and location. Filter shapes can look similar while differing in size, sealing edge, or filtration material. Do not install a filter that bows, leaves a gap, or requires force. A poor seal can allow debris past the filter or make the cover difficult to close.

    Follow the service schedule

    Replacement timing varies by model and environment. Dusty roads, construction areas, wildfire smoke, heavy pollen, and frequent driving can shorten filter life. Some manuals list both a normal and severe-use interval. Check the schedule for the conditions that match your driving and use the vehicle maker’s interval as the baseline.

    AAA’s maintenance guidance suggests inspecting engine and cabin filters during service, while noting that dusty conditions can change how soon they need replacement. A filter does not need to be changed solely because it looks gray. Modern media can hold fine particles that are difficult to judge visually. If the manual provides an inspection method or replacement interval, follow it.

    Symptoms that justify a check

    A reduced airflow from the vents, persistent musty odor, or a fan that seems less effective can prompt a cabin-filter inspection. These symptoms can also come from moisture, a blocked drain, or a ventilation-system fault. Replacing the filter may not fix the underlying cause. If odor remains after a correct filter change, have the system inspected.

    An engine filter may need attention if the service interval has arrived or if it has been exposed to unusually dusty conditions. Poor performance can have many causes, so do not treat a dirty-looking filter as a diagnosis for a check-engine light or rough running. If the engine warning light is on, have the fault codes and vehicle systems checked.

    Replace a filter without damaging its housing

    Work with the vehicle switched off and cool. Photograph the old filter before removal so you can check its orientation. Note arrows marked AIR FLOW or UP and reinstall the replacement in the direction specified by the manufacturer. Remove loose leaves or dust from the empty housing with a clean, dry method that will not send debris into the intake. Do not use compressed air on a disposable filter unless its maker specifically allows it; high pressure can damage filter media or force debris deeper into the system.

    Close every clip or screw evenly. Check that the housing gasket sits flat and that no tools or rags remain in the engine bay. If access requires removing electrical components, wiper assemblies, airbags, or brittle trim, leave the job to a technician. Cabin-filter doors can be easy to break, and incorrect reassembly may create rattles or air leaks.

    Choose a suitable replacement

    Use the part number or specification approved for the exact vehicle. An aftermarket filter may be suitable when it meets the required dimensions and performance standard. Be cautious with marketing claims that promise a large power increase or eliminate all pollutants. Cabin filters differ in their ability to capture particles and odors; check the product description and vehicle fitment rather than assuming all filters provide the same filtration.

    Record the date and mileage when you replace each filter. That helps distinguish a maintenance reminder from a ventilation problem and makes the next inspection easier. Pair the check with an oil service if that matches your schedule. Our oil guide explains how to find the specifications and service interval in the manual.

    Source: AAA’s time-stamped maintenance checklist. Always confirm the filter location and service interval in your vehicle manual.

  • How to Check Engine Coolant and Spot Leaks

    How to Check Engine Coolant and Spot Leaks

    Engine coolant carries heat away from the engine and helps protect the cooling system. A low level or leak can lead to overheating and expensive damage. You can check the reservoir visually on many cars, but the system may be pressurized and extremely hot. The main safety rule is simple: inspect coolant only when the engine is fully cool, and never open a hot radiator or pressurized cap.

    Find the right reservoir

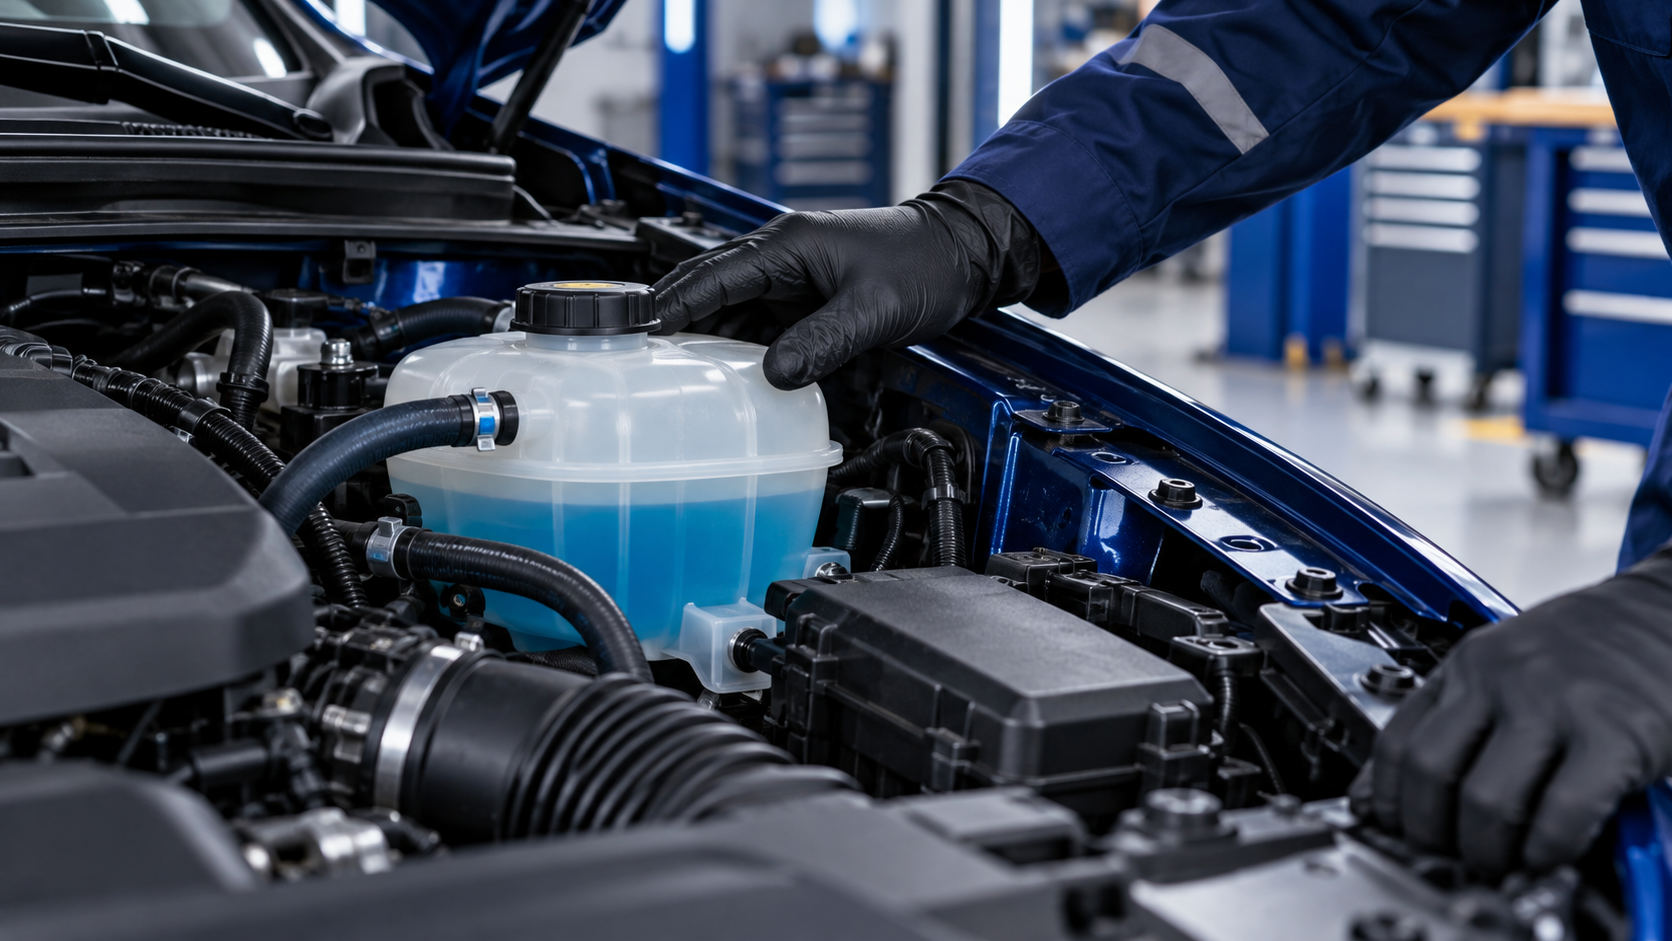
    Use the owner’s manual to locate the coolant expansion tank and identify its level marks. Many tanks are translucent, with MIN and MAX or COLD and FULL lines. Park on level ground, switch the engine off, and let it cool completely. Compare the coolant level with the cold mark. Do not mistake the windshield-washer reservoir for coolant; the cap and manual should identify the correct one.

    If the reservoir is below its minimum mark, check the manual for the exact coolant specification and whether it is supplied premixed or must be diluted. Coolants can use different chemistries, even when their colors look alike. Do not mix products by color or top up with an arbitrary fluid. If the correct type is unclear, ask a dealer or qualified repair shop.

    Never open a hot cooling system

    Hot coolant can be under pressure and can cause severe burns. Do not remove a radiator cap or reservoir cap while the engine is hot, steaming, or recently overheated. Wait until the vehicle has cooled fully and follow the manual. Do not lean over the cap or squeeze hoses to test for pressure. If the temperature gauge rises into the danger zone or a temperature warning appears, pull over safely, switch off the engine, and follow the vehicle’s overheating instructions. Arrange roadside assistance if the warning persists or steam is visible.

    Do not pour cold water onto a hot engine or continue driving to reach a workshop while the temperature is high. A cooling fan can start unexpectedly, and electric fans may operate even after the engine is switched off. Keep hands, clothing, and tools clear of fans and belts.

    Look for signs of a leak

    When the car is parked and cool, look under it for fresh puddles or dried residue near the reservoir, radiator, hoses, or water pump area. Coolant color varies, so do not identify a fluid by color alone. A sweet smell, repeated need to add coolant, a low-level warning, or an unexplained temperature rise also needs investigation. A leak may occur only when the system is hot, so the absence of a puddle does not rule it out.

    Inspect only what is safely visible. Look for cracked or swollen hoses, damp connections, loose clamps, damaged reservoir seams, or crusted deposits. Do not reach between hot components or under a vehicle supported only by a jack. A mechanic can pressure-test the system and check for internal leaks that are not visible from outside.

    Use the correct service interval

    Coolant replacement intervals vary by vehicle, coolant chemistry, and service schedule. Some modern vehicles use long-life coolant, while others require more frequent replacement or special bleeding procedures. Follow the model-specific schedule rather than using a universal mileage interval. Keep a record of the product used and date of service, especially if a repair shop has drained or replaced coolant.

    After a repair, air can remain in the cooling system if it is not filled and bled correctly. Some vehicles require a specific service mode, vacuum-filling equipment, or a set procedure. If the temperature fluctuates, the heater stops producing warm air, or the reservoir level drops again after service, contact the repairer promptly.

    When a warning appears on the road

    If the engine temperature warning appears, reduce load and pull over as soon as it is safe. Switch off the engine and keep people away from steam or hot fluid. Follow the manual for that warning. Do not open the hood if steam is escaping from the engine bay; wait until it is safe. Call for assistance if the warning does not clear after cooling, coolant is leaking, or the engine runs poorly.

    AAA’s coolant guidance also stresses checking a reservoir with the engine cold and seeking help when coolant loss keeps recurring. For related under-hood checks, see our engine-oil guide.

  • Brake Maintenance: Warning Signs and Inspection Basics

    Brake Maintenance: Warning Signs and Inspection Basics

    Brake wear develops over time, but changes in sound, pedal feel, or stopping behavior can signal a problem that needs prompt attention. A quick visual check can help you notice issues. It cannot measure the condition of every brake component, so rely on the inspection interval in the owner’s manual and have a technician examine any warning signs.

    Notice changes while braking

    Listen for persistent squealing, scraping, or grinding. Some pads use a small wear indicator that makes a squeal, while dirt or moisture can also make temporary noise. Grinding may mean friction material is depleted or another component is contacting the rotor. Have the brakes inspected rather than trying to diagnose the sound by ear alone.

    Pay attention to a car that pulls to one side, a pedal that feels unusually soft or sinks, increased pedal travel, a pulsating pedal or steering wheel, or a longer stopping distance. These symptoms can have several causes, including worn pads, a sticking component, rotor issues, low fluid, or a tire problem. They all deserve a prompt inspection. If braking feels weak, the pedal drops toward the floor, or a brake warning appears with a change in behavior, stop in a safe location and arrange professional help. Do not continue driving to see if it improves.

    Smoke, a strong burning smell, or one wheel becoming much hotter than the others can signal overheating or a fault. Pull over where safe, avoid touching wheels or brake parts, and let a professional assess the vehicle. Do not pour water on hot brakes. If there is smoke or a fire risk, move away from the vehicle and contact emergency services.

    Check warning lights and fluid carefully

    Read the manual for the meaning of brake, ABS, and stability-control warnings on your exact model. A brake warning light may relate to the parking brake, fluid level, or another system fault. The same symbol can behave differently across vehicles. If the light remains on after you have released the parking brake, follow the manual’s instructions and arrange an inspection.

    Some vehicles have a translucent brake-fluid reservoir with level marks. Only check it as the manual directs. A falling level can accompany pad wear, but it can also indicate a leak. Do not simply top it up and ignore a repeated drop. Brake fluid absorbs moisture over time and must meet the required specification; opening a sealed system or using the wrong fluid can affect braking. Leave bleeding, line repair, and fluid replacement to someone with the right equipment and procedure.

    Understand inspection and service intervals

    Brake components wear at different rates according to driving style, terrain, vehicle load, traffic, and regenerative-braking use. The manual or maintenance schedule may call for inspection at specific services. Have pads, rotors or drums, hoses, calipers, parking-brake parts, and fluid checked as appropriate. Ask the shop to show the measured pad thickness and explain whether parts need replacement now or can be monitored.

    Replacing pads on one side only can create uneven braking. Axle pairs are commonly serviced together, but the technician should follow the vehicle maker’s procedure. Rotors may be reusable if they meet thickness and condition limits. Replacing parts without checking measurements can waste money, while waiting too long can damage other components.

    Electric and hybrid braking systems

    Regenerative braking lets the motor slow a hybrid or electric vehicle and recover some energy. The friction brakes remain important for stronger stops and when regeneration is limited. The U.S. Department of Energy notes that regenerative braking can reduce brake wear in electric vehicles. Even so, have the system inspected on the schedule in the manual, especially if the car is used in wet or corrosive conditions or the brakes make unusual noises.

    Do not work around high-voltage components or attempt brake service on an EV without training. Some vehicles require an electronic service mode before brake work. A qualified shop can follow the model-specific procedure and safely disable or manage the relevant systems.

    What to tell the repair shop

    • When the symptom began and whether it changes with speed, temperature, or rain.
    • Whether the vehicle pulls, vibrates, makes noise, or has a warning light.
    • Whether the pedal feels different from normal.
    • Recent tire, suspension, or brake work and any fluid spots under the car.

    Describe what you feel without guessing at the failed part. AAA’s overview of brake warning signs includes pulling, pedal changes, vibration, noise, and longer stopping. Follow your owner’s manual for intervals, then book an inspection when the vehicle’s behavior changes.

  • Car Battery Care: Warning Signs and Safe Checks

    Car Battery Care: Warning Signs and Safe Checks

    A weak 12-volt battery can leave a car unable to start, even when the engine and the rest of the vehicle are in good condition. Regular visual checks and a timely battery test can catch some problems early. Battery designs vary, and hybrid or electric vehicles may contain a separate high-voltage system that owners should not service.

    Know which battery you are inspecting

    Most gasoline cars use a 12-volt starter battery. Hybrids and battery-electric vehicles also have a 12-volt battery for accessories and control systems, alongside a high-voltage traction battery. The high-voltage pack has different safety requirements. Do not touch orange cables, open battery covers, probe connectors, or attempt repairs on a traction battery. Use the manufacturer’s manual and a technician trained for that vehicle.

    Before opening the hood, check the manual for battery location and precautions. Some vehicles place the 12-volt battery in the trunk or under a seat; jump-start terminals may be elsewhere. If the battery is cracked, swollen, leaking, unusually hot, or gives off a strong sulfur-like odor, keep away and arrange professional help. Do not lean over it or try to charge it.

    Inspect the case and connections

    With the vehicle off and the key away from the car, look for a secure hold-down, damaged cables, a cracked case, or corrosion around the terminals. Corrosion can appear as a powdery deposit. A loose or corroded connection can interfere with starting, but disconnecting a battery can erase settings or trigger procedures on some vehicles. Follow the service instructions for your exact model before touching a terminal.

    Do not pour water or household cleaner onto electrical connectors. If the terminals need cleaning, use the vehicle maker’s procedure or have a shop service them. Wear eye protection and gloves if the manual allows owner maintenance. Never bridge the positive and negative terminals with a tool, and keep metal jewelry and loose tools away from the battery. Lead-acid batteries contain corrosive acid and can release explosive gas while charging.

    Watch for changes in starting

    Slow cranking, repeated clicking, dim lights, unexplained electrical resets, or a need for jump-starts can indicate a weak battery. They can also point to a charging-system fault, a starter problem, or an electrical drain. A battery test measures condition; a technician can also test the alternator or DC-to-DC charging system and look for parasitic loads.

    Battery life depends on climate, trip length, vehicle design, and use. Short trips may not replace the energy used to start the engine, while heat can accelerate battery wear. Rather than replacing a battery on a fixed universal schedule, ask for a test if starting changes or before a season when failure would be especially disruptive.

    Use the correct replacement

    When replacement is needed, match the size, terminal layout, chemistry, capacity, and starting rating specified for the vehicle. Some cars require an absorbent glass mat (AGM) battery or an enhanced flooded battery, and some need the replacement registered to the vehicle’s battery-management system. A similar-looking battery can still be unsuitable.

    Ask the installer whether the vehicle needs coding, a memory-saving procedure, or battery registration. Keep the receipt and warranty details. Used lead-acid batteries should go to a proper recycling or collection point; do not put one in household waste.

    Jump-start only when the manual allows it

    Jump-starting instructions vary. Use the designated terminals and sequence in the manual, with a compatible booster or donor vehicle. Incorrect connections can damage electronics or cause sparks near battery gas. Never jump-start a battery that is frozen, leaking, swollen, or visibly damaged. If you are unsure which terminal to use, call roadside assistance.

    After a jump, a vehicle may start but still have a failing battery or charging fault. Arrange a test rather than assuming a long drive has solved the problem. For hybrid and electric vehicles, follow the specific instructions for their 12-volt system and never use the traction battery or high-voltage cables as a DIY service point.

    AAA’s battery warning guide describes common symptoms such as slow starts and repeated jump-starts. For broader care across powertrains, see the Department of Energy’s electric-vehicle maintenance guidance.

  • Choosing and Checking Engine Oil for Your Car

    Choosing and Checking Engine Oil for Your Car

    Engine oil lubricates moving parts, helps carry heat away, and holds some contaminants until the filter captures them. The wrong oil or a missed service interval can affect engine protection. Start with the specifications in your owner’s manual; bottle color, brand, and a popular viscosity grade cannot tell you whether an oil is right for your engine.

    Find the required oil specification

    Look in the maintenance or fluids section of the manual for the required SAE viscosity grade and performance category. The viscosity grade describes how the oil flows across defined temperature conditions. Many modern oils use a multi-grade designation such as 0W-20 or 5W-30, but the correct choice depends on the engine design and ambient-temperature guidance from its maker.

    The American Petroleum Institute (API) explains its service categories and certification marks in its Motor Oil Guide. Look for the API mark and category required by the vehicle maker. Some vehicles also specify ACEA, ILSAC, or manufacturer approvals. The latest container is not automatically correct for every older engine, so match the specification printed in the manual rather than choosing by a claim such as “synthetic” alone.

    If the vehicle has a diesel engine, turbocharger, gasoline particulate filter, or another emissions system, confirm the exact oil requirement. Using an oil formulated for a different application may not provide the required protection or compatibility. When a manual lists several approved grades, use its temperature chart and ask a qualified service professional if your climate or driving falls outside the standard range.

    Check the oil level safely

    Some vehicles have a dipstick; others show oil level electronically. Follow the manual because the engine may need to be warm or cold, parked on level ground, or left off for a specific time. For a dipstick, remove it, wipe it clean, insert it fully, then pull it out and read the level against the marked range. A reading below minimum needs attention. Do not overfill: too much oil can also cause damage.

    If you need to add oil, use the specified grade and add a small amount at a time. Wait briefly, then recheck. Keep dirt out of the filler opening, replace the cap securely, and wipe up spills. If the dipstick stays dry or the oil-pressure warning appears while the engine is running, stop safely and shut the engine off. An oil-pressure warning may indicate a problem that topping up alone will not fix; consult the manual and arrange professional help before continuing.

    Follow the vehicle’s service interval

    Oil-change intervals vary by engine, oil specification, model year, operating conditions, and maintenance-monitor logic. Use the schedule in the owner’s manual or the vehicle’s oil-life monitor, whichever the manufacturer directs. Do not substitute an old rule of thumb for the interval written for your car. Frequent short trips, dusty roads, towing, high temperatures, and extended idling may count as severe service for some vehicles.

    Keep a record of the date, mileage, oil grade, filter, and service performed. If the car uses an oil-life monitor, reset it only after the service is complete, following the instructions in the manual. A dashboard reminder tracks a programmed or calculated interval; it does not verify oil level or diagnose a leak. Check the level according to the maintenance instructions between services when the manufacturer recommends it.

    Look for leaks and changes

    After parking, notice whether fresh fluid appears beneath the engine. Engine oil is often brown or amber when new and can darken with use, but color alone is not a reliable measure of condition. A technician can identify an unknown leak and check whether it comes from the engine, transmission, or another system. Also pay attention to a burning-oil smell, smoke, unusual engine noise, or repeated low-level readings. These symptoms need diagnosis rather than repeated topping up.

    Use the right filter and replacement parts when the oil is changed. The filter specification, drain-plug washer, and tightening procedure are vehicle-specific. If servicing the car yourself, work on a stable surface, use proper supports, keep clear of hot components, and dispose of used oil and the filter through a local collection or recycling program. Never work beneath a vehicle supported only by a jack.

    What to keep in the glovebox record

    • Oil grade and performance specification from the manual.
    • Date and odometer reading at each oil and filter change.
    • Receipts showing the product and service performed.
    • Any oil additions, warning lights, or leaks between scheduled services.

    These notes make it easier to spot repeated oil loss and help a future technician understand the service history. For other routine checks, see our coolant inspection guide and air-filter guide.

    Source: American Petroleum Institute, Motor Oil Guide. Your vehicle manual controls the oil type and service interval.

  • How to Understand Tire Sidewalls and When to Replace Tires

    How to Understand Tire Sidewalls and When to Replace Tires

    A tire’s sidewall carries practical details for choosing a replacement and checking its condition. The markings can look cryptic, and the largest pressure number is easy to misread. Use the information as a starting point, then confirm the required fitment in the vehicle’s door label or owner’s manual.

    Start with the size listed for the vehicle

    A size code such as 205/55R16 describes dimensions and construction. The first number is nominal section width in millimeters. The second is the sidewall height expressed as a percentage of width. “R” identifies radial construction, and the final number is the wheel diameter in inches. This is only one part of the specification. Load index and speed symbol also matter, and the manufacturer may approve more than one fitment for a particular trim.

    Check the vehicle’s tire placard and owner’s manual before ordering. The placard may list the original tire size and the recommended cold inflation pressure. Do not choose a tire based only on whether it fits over the wheel. A different size or rating can change clearance, handling, speedometer readings, load capacity, and the way driver-assistance systems behave. Ask a qualified tire dealer to confirm any alternate fitment for the exact year and trim.

    Understand the pressure and load markings

    The maximum pressure molded into the tire sidewall is not the pressure to use for normal driving. Set inflation to the vehicle maker’s cold-pressure specification. The sidewall may also show a maximum load value. That number is not a recommended payload for the car; the vehicle’s own load limits and placard govern how much it can carry.

    Look for the load index and speed symbol in the tire size line or nearby. These markings identify a tire’s standardized load and speed capability under specified conditions. A replacement should meet the vehicle manufacturer’s requirements. Do not fit a lower rating because a tire appears physically similar. If you are unsure how the markings apply, have a tire professional check them against the vehicle documentation.

    Check tread, damage, and age

    Inspect the full width of each tire’s tread. Built-in wear bars sit across the main grooves. When the tread is level with them, replacement is due. NHTSA identifies 2/32 inch as the minimum tread depth in the United States; legal limits differ by jurisdiction, and wet-weather performance can decline before a tire reaches the legal minimum. Use a tread-depth gauge at several points because wear can vary across the tire.

    Look at the sidewall and tread for bulges, deep cuts, cracks, exposed cords, or an object lodged in the tire. A sidewall bulge can indicate internal damage. Do not try to patch a sidewall or continue driving on a tire with obvious structural damage. A tire shop can inspect it from the inside and advise whether repair is allowed. Vibration, unusual noise, repeated pressure loss, or a sudden change in handling also deserves an inspection.

    To estimate a tire’s manufacturing date, find the final four digits of the DOT Tire Identification Number (TIN) on its sidewall. For tires made since 2000, the first two digits indicate the production week and the last two the year. A code ending in 1824, for example, indicates a tire made in week 18 of 2024. The complete date code may appear on only one side, so the inner sidewall may need to be checked by a professional.

    Age alone does not give a universal replacement date. NHTSA notes that some vehicle and tire makers recommend replacing tires within six to ten years, regardless of tread depth. Check the recommendations for your vehicle and tire brand, especially if a car is stored or driven infrequently. A clean-looking tire can still have age-related deterioration.

    Compare replacement tires on the details

    Begin with the approved size, load index, and speed symbol. Then compare wet traction, winter capability, noise, expected tread life, and the kind of roads you use. Tire labels and rating systems differ among markets. In the United States, the Uniform Tire Quality Grading system provides certain comparative information for passenger tires, but it does not cover every performance characteristic or predict an exact service life. Read what each label measures before using it to rank tires.

    Replacing all four tires together can maintain consistent grip, but a single replacement may be needed after damage. If you replace fewer than four, ask a tire professional which axle should receive the newer tires and whether the existing tires are compatible. All-wheel-drive systems can have strict limits on differences in circumference. Follow the vehicle manufacturer’s procedure.

    Do not overlook the spare

    A spare can age while the other tires are used. Check its pressure and condition according to the manual. A compact temporary spare is intended for limited emergency use, with speed and distance restrictions. A full-size spare should match the vehicle’s approved specification. NHTSA advises against using an aged full-size spare as a routine replacement for worn tires.

    After fitting new tires, have them balanced and the wheel fasteners tightened to the specified torque. Ask whether the TPMS sensors need service or calibration. Our monthly tire pressure checklist covers routine inflation and visual checks. NHTSA’s TireWise resource includes tire labeling, age, maintenance, and recall information.

  • How to Check Tire Pressure and Inspect Tires Each Month

    How to Check Tire Pressure and Inspect Tires Each Month

    Correct tire pressure affects how a vehicle steers, brakes, and wears its tires. A tire can look normal while it is low, so a quick glance is no substitute for a gauge. A monthly check takes only a few minutes and can help catch a slow leak before it becomes a roadside problem.

    Find the pressure specified for your car

    Use the tire and loading information label on the driver-side door area or the owner’s manual. The correct cold pressure is set by the vehicle maker for that car and its tire fitment. The number molded on a tire’s sidewall is its maximum permitted pressure, not the vehicle’s recommended setting. Some cars specify different pressures for the front and rear tires or for a fully loaded vehicle, so read the complete label.

    Keep a small, accurate pressure gauge in the car. Digital and dial gauges both work when used as directed. If the car has a tire-pressure monitoring system (TPMS), treat its warning as a reason to inspect the tires. The system may warn only after pressure has fallen significantly; it does not replace routine gauge checks. Consult the manual if the TPMS needs to be reset after adjustment.

    Measure when the tires are cold

    NHTSA describes a cold tire as one that has not been driven for at least three hours. Park on level ground, remove the valve cap, press the gauge squarely onto the valve stem, and record the reading. A brief hiss can occur as the gauge seals, but a sustained hiss means the gauge may not be seated. Repeat the reading if it looks implausible.

    Compare each tire with the pressure for that wheel position. If you have driven recently, the tires will be warm and the measured pressure may be higher. Do not let air out of a warm tire just to match the cold-pressure figure. Recheck it after the vehicle has sat long enough to cool, then adjust to the label value. A cold reading is especially useful when temperatures change sharply between seasons.

    Add or release air in small steps

    If a tire is low, add air with a compressor and recheck with your gauge. Many service-station inflators have their own gauge, but readings can vary, so verify the result. Add air in short bursts to avoid overshooting. If pressure is high, use the gauge’s release valve or press the valve core briefly, then measure again. Replace the valve cap when finished; it helps keep dirt and moisture away from the valve.

    Check all four road tires, even if only one warning appeared. Check a spare as well if your car carries one and the manual provides its pressure. Some temporary spares use a different, higher pressure and are intended for limited use. If the vehicle has different front and rear specifications, follow each value rather than making all tires match.

    Look for damage and pressure loss

    While you are beside each wheel, scan the tread and sidewall for cuts, cracks, bulges, embedded objects, or exposed cords. Do not pull out a nail or screw; removing it can release air quickly. Arrange a tire-service inspection. A bulge, a sudden pressure drop, or visible structural damage needs prompt attention. If the tire is losing air rapidly or the car feels unstable, stop in a safe place and arrange help.

    Note the readings over time. If one tire repeatedly needs air, it may have a puncture, a damaged valve, or a sealing problem at the wheel. Do not keep topping it up indefinitely. Ask a tire professional to identify the cause and inspect the inside of the tire before repair. A repair may be possible only when the damage and its location meet recognized repair limits.

    Use wear patterns as a clue

    Uneven wear can point to pressure, alignment, suspension, or rotation issues. Wear concentrated on both shoulders can accompany underinflation; wear concentrated in the center can accompany overinflation, but the pattern alone does not prove the cause. Photograph the tread and ask a technician to inspect it. Follow the vehicle manual for rotation intervals and patterns, since some cars have staggered tire sizes or directional tires that cannot be rotated in every position.

    For a fuller routine, inspect tread depth and age as well as pressure. Our tire replacement guide explains tread indicators, sidewall information, and signs that call for professional attention.

    A practical monthly routine

    • Check pressure when the tires are cold, using the vehicle label or manual.
    • Measure every road tire and the spare if fitted.
    • Adjust each tire to its specified pressure and replace the valve cap.
    • Look for visible damage, uneven wear, and objects in the tread.
    • Arrange an inspection if a tire loses pressure repeatedly or shows damage.

    Check again before a long drive if the tires have not been inspected recently. Load and pressure instructions can vary by vehicle, so use the manual when carrying a heavy load or towing. For safety and maintenance details, see NHTSA’s TireWise guidance.